In this post show you how Linux add disks to the Linux operating system so that they can be presented in the UDEV file system and used by our database.
First, let's list the disks we have on our virtual machine.
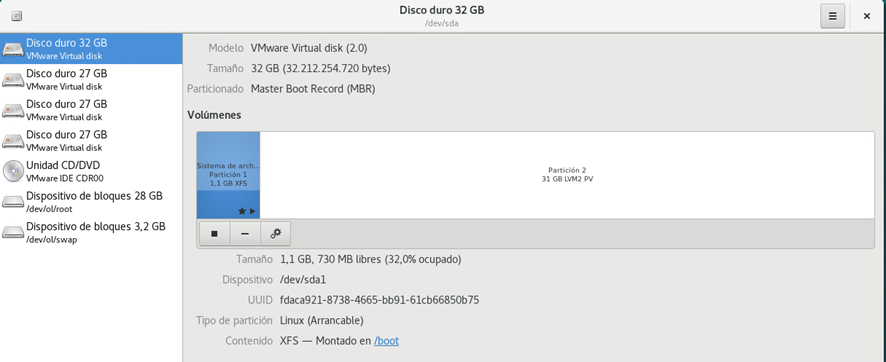
There are two ways, one manually and the other through a graphical form as shown below.
In this document we are not going to perform the actions graphically, as they are quite intuitive. You can rely on the documentation to perform the actions graphically. There are other graphical and widely used alternatives such as gparted, which we will present in later posts. In this case, therefore we will proceed to perform the process manually.
Steps to partition a Linux disk Linux
List of discs
We list the disks that we have available with lsblk. In this case we have three 25G disks to partition (sdb,sdc,sdd).

How to create Oracle ASM disksASM UDEV rules
We find the ID of the disks, in this example the /sdg.

We look for the serial, based on the "ID_SERIAL" indicator:
E:ID_SCSI_SERIAL=6000c29e02ce1d3ab248271bc4ea4847
E: ID_SERIAL=36000c29e02ce1d3ab248271bc4ea4847
E:ID_SERIAL_SHORT=6000c29e02ce1d3ab248271bc4ea4847
E: ID_WWN=0x6000c29e02ce1d3a
E:ID_WWN_VENDOR_EXTENSION=0xb248271bc4ea4847
E:ID_WWN_WITH_EXTENSION=0x6000c29e02ce1d3ab248271bc4ea4847
E:SCSI_IDENT_SERIAL=6000c29e02ce1d3ab248271bc4ea4847
We create a new udev rules file.
I saw /etc/udev/rules.asm.rules
The content is as follows: in our case, the disk in ASM for data (DATA).
[oracle~]# cat /etc/udev/rules.asm.rules
# Disk /dev/sdg
KERNEL=="sd*", SUBSYSTEM=="block", ENV{ID_SERIAL}=="36000c29e02ce1d3ab248271bc4ea4847", SYMLINK+="oracleasm/DATA2", OWNER="oracle", GROUP="dba", MODE="0660" ,OPTIONS:="nowatch"
Reload the udev/rules rules
udevadm control --reload-rules
udevadm trigger --type=devices --action=change
We verify the disks that will later be candidates for addition to the ASM disk groups, and check that our new disk has been added correctly.
[root@localhost ~]# ll /dev/oracleasm
total 0
lrwxrwxrwx. 1 root root root 6 Jun 8 19:04 DATA -> ../sdb
lrwxrwxrwx. 1 root root root 6 Jun 8 19:04 DATA1 -> ../sde
lrwxrwxrwx. 1 root root root 6 Jun 8 19:04 DATA2 -> ../sdg
lrwxrwxrwx. 1 root root root 6 Jun 8 19:04 DATA3 -> ../sdh
lrwxrwxrwx. 1 root root root 6 Jun 8 19:04 FRA -> ../sdc
lrwxrwxrwx. 1 root root root 6 Jun 8 19:04 FRA1 -> ../sdd
You will need to follow the steps described above for each of the disks you want to add to ASM your Oracle architecture. Once these steps are complete, the disks can be added to the ASM space, as indicated in the relevant section on the next page of blog: asm