The steps required to deploy an Oracle database Oracle the cloud are as follows:
1. Generate SSH keys
Es necesario generar las ssh Keys que serán lanzadas posteriormente para conectarse a una base de datos en OCI. Otra opción, es crearlas durante la creación de la Virtual Machime DB system, cómo haremos en este ejemplo.
2. Creación de una Virtual cloud Network (VCN)
Antes de poder provisionar una base de datos en OCI, es necesario desplegar en primer lugar una VCN (Virtual cloud Network). Una VCN es una red privada virtual utilizada para desplegar tu entorno Cloud.
Una vez logado en la consola OCI, para crear la VCN, pueds seguir los pasos necesarios en este enlace:
Creating a Virtual Network (VCN)
¡Importante!
La creación de una VCN en OCI es gratuita. Sin embargo la creación de un Servicio de base de datos en la nube de Oracle cómo servicio no es gratuita. Para ello hay otras opciones cómo puede ser Oracle Autonomous Database.
Se asume por tanto que dispones de créditos suficientes en tu consola OCI o que te encuntras en un entorno formativo donde puedes desplegar este entorno sin coste adicional.
3- Creación de uVirtual Machine DB system
Una vez hemos creado y configurado una Virtual clud Network (VCN), ya podemos desplegar una maquina virtual de base de datos a través de la consola OCI.
Para ello, una vez logados en la consola OCI, a través del siguiente link: Cloud Sign In
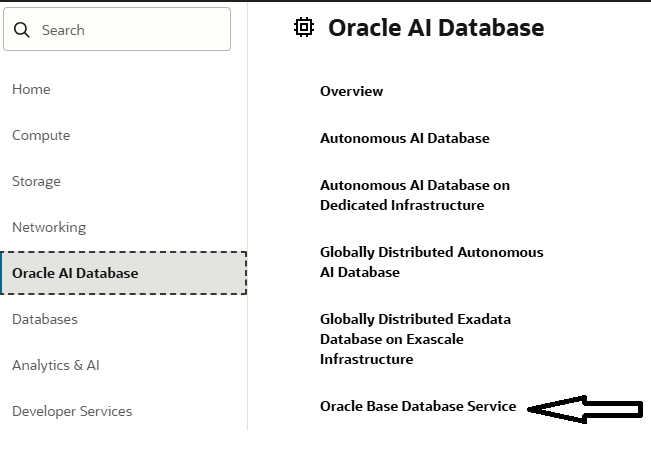
We navigate through the menu that appears on the left side of the screen.

Next, click on the Oracle Database option and then on Oracle Database Service.
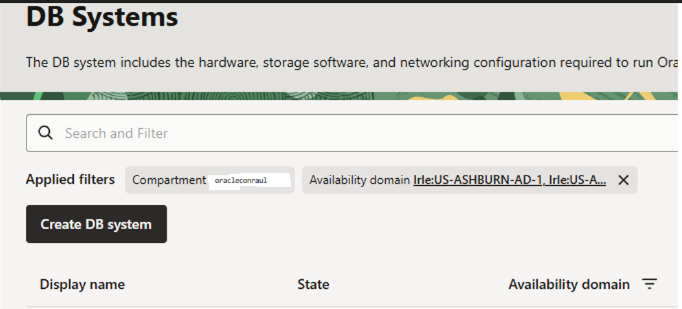
Elegimos el compartment sobre el que se desplegará nuestra base de datos y pulsamos sobre el botón Create DB system.
We fill in the necessary information according to our needs.
As a test, we will fill in the following.
- a. DB system name: oracleconraulVM
- b. Compartment: oracleconraul
- c. Shape: Click on "Change Shape." Select AMD, VM.Standard.E4.Flex, click on the three dots, choose "Update OCPU," and set it to 1.

- d. Oracle Database Software Edition: Enterprise Edition
- e. Escogemos Storage Managemente Software y elegimos Logical Volume Manager.
- f. Available Storage Size (GB): We choose 256 GB
- g. SSH Keys. Download both public keys by clicking on the "Save private Key" and "Save public Key" buttons. To connect, you will only need the private key.
It is very important to save these keys, as they will be necessary to connect to the database we are going to create. - h. License type: We choose License Included
- i. Virtual Cloud Network: Escogemos del desplegable la VCN que hemos creado en el punto 2.
- j. Client subnet: In this case, we will choose the "public-subnet" option created in step 2.
- k. Hostname prefix: oracleconraulHOST
- l. Database name: TEST
- m. Database unique name suffix: PROD
We enable the "Unified Auditing" option in the database.

Cambiamos la versión de base de datos para desplegar una versión 26ai, para ello pulsamos en el botón «Change Database Image». Elegimos desplegar la versión 26ai.


- n. PDB name: TESTPDB1
Le indicamos la password que gestionarán las cuentas de ususarios de SYS y SYSTEM.
La password debe ajustarse a los siguientes requisitos:
Password must be 9 to 30 characters and contain at least 2 uppercase, 2 lowercase, 2 special, and 2 numeric characters. The special characters must be _, #, or -.
Para este test, quitamos la opción «Enable automatic Backup» dejándola desactivada y pulsamos en el botón CREATE.
Aparecerá en la consla OCI el estado del provisionamiento de nuestra VM, este proceso tardará unos minutos.

If everything is correct, the status of our database will be Available.

If we click on the Databases tab, we can see that our database has been created correctly.

4- Connection to the newly created node
We go to the "Nodes" tab.

In our case, we have configured a public IP address for training purposes, so we can connect from outside.
In this case, we are going to connect with Mobaterm https://mobaxterm.mobatek.net/, taking advantage of the fact that it accepts OpenSSSH keys. If you try to connect with PuTTY, for example, you will have to create or convert the key to .ppk.
If you need to connect with Putty how to do it putty
We will run the MobaXterm application, and in the SSH tab - > Advanced SSH Settings, we will fill in the following.
a. Remote Host: IP Pública de la pestaña nodes de OCI, en nuestro caso 150.X.X.X
b.Specify ussername: opc (default oracle user compute Instances OCI).
c. Use Private Key: Pinchamos la opción «Use Private Key» y la enlazamos con la IP privada descargad anteriormente.
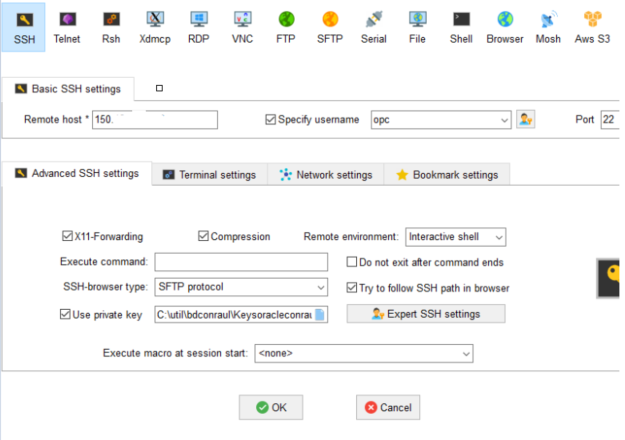
Although there are many more options, this would be sufficient.
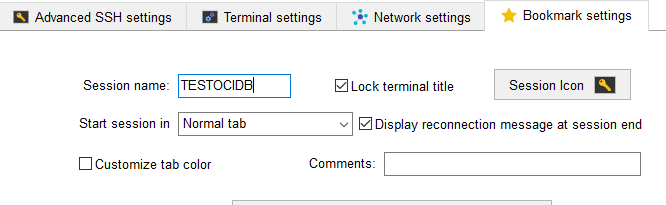
In the Bookmark settings tab, we can give the session an identifying name. In Session Name, we enter TESTOCIDB to identify it and click OK.
Si todo es correcto entraremos en nuestra máquina virtual de forma correcta.

We can now verify that the database has been created correctly according to the characteristics we selected earlier.
[opc@oracleconraulhost ~]$ sudo su – oracle
Last login: Thu Feb 12 11:42:27 UTC 2026 on pts/0
[oracle@oracleconraulhost ~]$ . oraenv
ORACLE_SID = [TEST] ? TEST
The Oracle base has been set to /u01/app/oracle
[oracle@oracleconraulhost ~]$ sqlplus / as sysdba
SQL*Plus: Release 23.26.0.0.0 – for Oracle and Engineered Systems on Thu Feb 12 11:44:21 2026
Version 23.26.0.0.0
Copyright (c) 1982, 2025, Oracle. All rights reserved.
Connected to:
Oracle AI Database 26ai Enterprise Edition Release 23.26.0.0.0 – for Oracle Cloud and Engineered Systems
Version 23.26.0.0.0
SQL*Plus: Release 23.26.0.0.0 – for Oracle Cloud and Engineered Systems on Thu Feb 12 16:39:27 2026
Version 23.26.0.0.0
SQL> show pdbs
CON_ID CON_NAME OPEN MODE RESTRICTED
———– —————- —————— ——————-
2 PDB$SEED READ ONLY NO
3 TESTPDB1 READ WRITE NO